Upgrades - MS Series Hard
Drives Can I Upgrade my Hard Disk (HD)?
Yes, you can either replace your existing HD with a larger capacity disk
drive, or, if your machine has room, install a second one. The latter option has several
advantages - it means you can still continue to use your existing drive as well as the new
one, and you don't have to re-install your operating system and software, etc. If you
install a second drive the HD's are known as Master and Slave - the first drive containing
the operating system is the Master, and the second non-bootable drive is the Slave.
Master and Slave
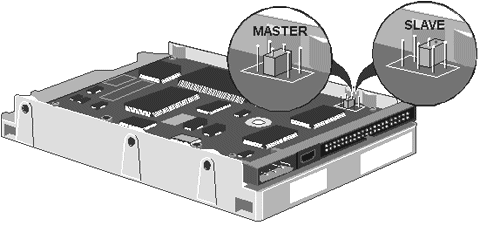
Because two IDE drives are (or can be) plugged into the same signal cable, each drive
needs to be configured as either Master or Slave so that your computer can tell which is
which. Configuration details vary for different disk drive manufacturers and even
different models. Most drives are supplied with documentation which tells you how to
configure it as Master or Slave, and also provides information on its specification. A
typical method of configuring a hard drive using jumpers is shown below.

Jumpers
These are small plastic-covered connector blocks that can be pushed onto two adjacent pins
to electrically connect them together and are used on small circuit boards instead of
switches.
- If OFF or REMOVED the circuit is broken.
- If ON or PRESENT the circuit is complete enabling current to pass.
You will normally have DS and SP jumpers on your HD:
- DS = Drive Select
- SP = Slave Present
To configure a drive as a Slave, remove the DS Jumper, and note that you
may need to fit the SP Jumper to the Master drive as well as the DS Jumper.
Installing a second hard drive
- Turn Off the computer and unplug all power leads.
- Take suitable ANTI-STATIC precautions and
remove the system unit cover.
- Unpack your new HD and place it on a soft stable surface.
- Set the new HD to SLAVE normally by removing the DS Jumper.
- Unplug the power and signal cables from the master HD and remove the
drive bay from the computer.
- Install the new HD into the drive bay and secure it with the screws
provided.
- Place the drive bay back into the computer and connect the power and
signal cables.
- Refit the system unit cover.
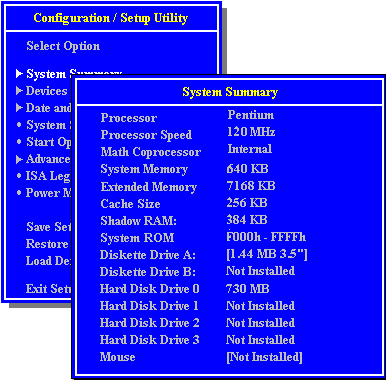
- Configure your new HD in SETUP and reboot your machine.
Windows 95 will now automatically configure the new HD to
the next avaliable drive letter, normally drive D:. If you are running an earlier
version like Windows 3.11, you will have to PARTITION and FORMAT your HD before
running Windows.
Automatic SETUP
The BIOS in most PCs today detects any new hard disk, CD-ROM or memory automatically, and
all you will have to do is confirm and save any changes.

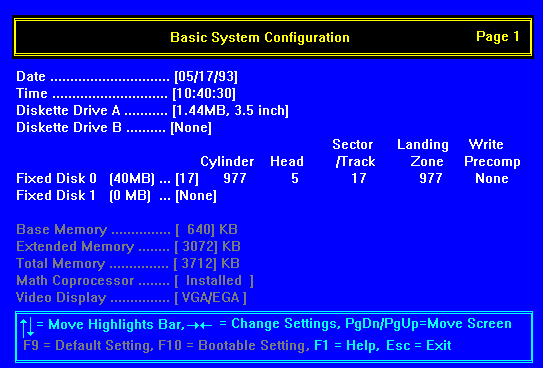
Manual SETUP
If you have an older PC you may have to manually configure the BIOS with the SETUP
program.
- Enter SETUP.
- Select the Fixed Disk 1 (this is second hard drive; the first one is
Fixed Disk 0).
- Enter the C.H.S. (Cylinders, Heads and Sectors) as supplied by the
manufacturer.
- Save the settings, exit SETUP and REBOOT.

IDE v. EIDE Interfaces
IDE (Integrated Drive Electronics), originally known as ATA
(AT Attachment), supports two hard disks up to 504MB formatted capacity.
EIDE (Extended Integrated Drive Electronics) is a trade
mark of Western Digital. It is based on the ATA-2 and ATAPI standards and can support 4
devices (2 EIDE and 2 IDE). It does not have a 504MB limitation.
 

|


